

版权声明:转载请注明出处 http://www.codingsoho.com/zh/blog/django-deply-on-windows/
配置
本例的基本配置如下:
工作目录: C:/virtualenv/zakkabag
项目名称: zakkabag
最终的安装版本如下,后面我会一步一步描述如何安装及部署
| 操作系统 | python | mysql | apache |
|---|---|---|---|
| Windows Server 2016 64bit python 2.7.3 (32 位) | python-2.7.3.msi 32位安装版 | mysql-5.5.12-win32.msi + MySQL-python-1.2.4b4.win32-py2.7.exe 32位安装版 | httpd-2.2.25-win32-x86-no_ssl.msi + mod_wsgi-win32-ap22py27-3.3 |
安装
Python
获取路径 Windows x86 MSI Installer (2.7.3) (sig)
安装路径:
D:\Python27 (example)
安装完成之后,记得把D:\Python27加入环境变量Path,这样Python命令可以在任意路径执行
执行python命令,如果出现下面信息,说明安装已成功
C:\Users\User1>python
Python 2.7.6 (default, Nov 10 2013, 19:24:18) [MSC v.1500 32 bit (Intel)] on win32
Type "help", "copyright", "credits" or "license" for more information.
Django
Django的安装有多种方法,可以从源码安装,也可以利用pip命令安装
源码安装
文件路径; D:\Django-1.5.5 (example),这是一个很老的版本,之前用这个方法安装过,这儿仅是提供一种方法,一般我现在采用pip方法安装
安装命令:
cd D:\Django-1.5.5
python setup.py install
Django会在python Lib目录下面创建新的目录: d:\Python27\Lib\site-packages\django
….
byte-compiling d:\Python27\Lib\site-packages\django\views\i18n.py to i18n.pyc
byte-compiling d:\Python27\Lib\site-packages\django\views\static.py to static.py
……
byte-compiling d:\Python27\Lib\site-packages\django\views\__init__.py to __init__.pyc
byte-compiling d:\Python27\Lib\site-packages\django\__init__.py to __init__.pyc
running install_scripts
creating d:\Python27\Scripts
copying build\scripts-2.7\django-admin.py -> d:\Python27\Scripts
running install_egg_info
Writing d:\Python27\Lib\site-packages\Django-1.5.5-py2.7.egg-info
上面打印copying build\scripts-2.7\django-admin.py -> d:\Python27\Scripts
就是在将安装包的内容拷贝到系统的python库里
把D:\Python27\Lib\site-packages\加入环境变量path
把D:\Python27\Script加入环境变量Path,这样django-admin.py可以在任意目录运行
pip安装
pip install django==1.5.5
mysql & MySQLLdb
参考mysql安装指南
Apache
安装版
从官网下载apache安装包http://httpd.apache.org/download.cgi,我的安装路径如下
d:\Program Files\
我之前用的版本是httpd-2.2.25-win32-x86-no_ssl.msi, 官网最新已经不支持这种方式安装了。
安装完成之后,主要的路径及文件如下:
组件位置, 需要加载的组件放在该路径
d:\Program Files\Apache Software Foundation\Apache2.2\modules\
最重要的配置文件
d:\Program Files\Apache Software Foundation\Apache2.2\conf\ httpd.conf
相关错误打印可以在下面文件找到
D:\Program Files\Apache Software Foundation\Apache2.4\logs
免安装版
下载
直接从官网http://httpd.apache.org/download.cgi下载,并解压到对应目录。Window需从入口Files for Microsoft Windows进入,里面有多个option,也可直接从https://www.apachelounge.com/download下载,里面根据不同VC版本。
这儿不同的VC版本要注意清楚,后面mod_wsgi需要跟它对应。
例如: 进入VC15可以看到下面文件
- Apache 2.4.38 Win64 httpd-2.4.38-win64-VC15.zip (Window/Python 32位,VC15)
- Apache 2.4.38 Win32 httpd-2.4.38-win32-VC15.zip (Window/Python 64位,VC15)
mod_wsgi的版本如下
mod_wsgi‑4.6.5+ap24vc14‑cp35‑cp35m‑win32.whl
mod_wsgi‑4.6.5+ap24vc14‑cp35‑cp35m‑win_amd64.whl
mod_wsgi‑4.6.5+ap24vc9‑cp27‑cp27m‑win32.whl
mod_wsgi‑4.6.5+ap24vc9‑cp27‑cp27m‑win_amd64.whl
如果我们当前的环境是python3.5 win64,那么mod_wsgi该选用mod_wsgi‑4.6.5+ap24vc14‑cp35‑cp35m‑win_amd64.whl,可以看到这个版本的python只支持apache 24 VC14,那么就要下对应的版本httpd-2.4.38-win64-VC14.zip
对于python27可以看到,它顶多支持到vc9,但是已经找不到对应的vc9的apache了,https://www.apachelounge.com/download/win64/下面有一句话
Build with Windows® Platform SDK 7.1 and Visual Studio C++ 2010 SP1 aka VC10. VC10 has improvements, fixes and optimizations over VC9 in areas like Performance, MemoryManagement and Stability. Note: a VC10 binary loads VC9 and VC10 modules.
看上去它是支持 vc9的
apache下载时是区分是否支持ssl的(最新版本好像看不到不支持的了),如果要支持https,最好一开始就使用支持openssl的
apache 2.2 with openssl 下载地址
https://www.apachelounge.com/download/win32/
Apache 2.2.34 with openssl-1.0.2l
Last of the 2.2 series, No more development or maintenance to come
apache 2.4.x 都支持 openssl
配置
需要将一些对应的路径替换掉,以httpd-2.2-x64版本为例,将安装文件httpd-2.2.19-win64.rar解压到目录, 本文目录如下:
D:/PythonWebSW
修改文件如下
文件conf/httpd.conf
ServerRoot "/httpd-2.2-x64"
DocumentRoot "/httpd-2.2-x64/htdocs"
<Directory "/httpd-2.2-x64/cgi-bin">
ScriptAlias /cgi-bin/ "/httpd-2.2-x64/cgi-bin/"
替换为
ServerRoot "D:/PythonWebSW/httpd-2.2.19-win64"
DocumentRoot "D:/PythonWebSW/httpd-2.2.19-win64/htdocs"
<Directory "D:/PythonWebSW/httpd-2.2.19-win64/cgi-bin">
ScriptAlias /cgi-bin/ "D:/PythonWebSW/httpd-2.2.19-win64/cgi-bin/"
文件conf/extra/httpd-vhosts.conf
<VirtualHost *:80>
    ServerAdmin webmaster@dummy-host.example.com
    DocumentRoot "/httpd-2.2-x64/docs/dummy-host.example.com"
    ServerName dummy-host.example.com
    ServerAlias www.dummy-host.example.com
    ErrorLog "logs/dummy-host.example.com-error.log"
    CustomLog "logs/dummy-host.example.com-access.log" common
</VirtualHost>

<VirtualHost *:80>
    ServerAdmin webmaster@dummy-host2.example.com
    DocumentRoot "/httpd-2.2-x64/docs/dummy-host2.example.com"
    ServerName dummy-host2.example.com
    ErrorLog "logs/dummy-host2.example.com-error.log"
    CustomLog "logs/dummy-host2.example.com-access.log" common
</VirtualHost>
替换为
<VirtualHost *:80>
    ServerAdmin webmaster@dummy-host.example.com
    DocumentRoot "D:/PythonWebSW/httpd-2.2.19-win64/docs/dummy-host.example.com"
    ServerName dummy-host.example.com
    ServerAlias www.dummy-host.example.com
    ErrorLog "logs/dummy-host.example.com-error.log"
    CustomLog "logs/dummy-host.example.com-access.log" common
</VirtualHost>

<VirtualHost *:80>
    ServerAdmin webmaster@dummy-host2.example.com
    DocumentRoot "D:/PythonWebSW/httpd-2.2.19-win64/docs/dummy-host2.example.com"
    ServerName dummy-host2.example.com
    ErrorLog "logs/dummy-host2.example.com-error.log"
    CustomLog "logs/dummy-host2.example.com-access.log" common
</VirtualHost>
apache 2.4.x
httpd-2.4.38-win64-VC14修改如下
Define SRVROOT "E:/Computer/httpd-2.4.38-win64-VC14"
直接修改根目录即可, DocumentRoot自会跟着修改
DocumentRoot "${SRVROOT}/htdocs"
其他的配置:
ServerName www.example.com:8082 (optional)
安装
D:\PythonWebSW\httpd-2.2.19-win64\bin>httpd -k install -n "Apache24"
注:Apache24为安装服务名称
有的时候会报错
D:\httpd-2.2.19-win64\bin>httpd -k install
Installing the Apache2.2 service
The Apache2.2 service is successfully installed.
Testing httpd.conf....
Errors reported here must be corrected before the service can be started.
httpd: Could not reliably determine the server's fully qualified domain name, using 192.168.1.101 for ServerName
(OS 10013)An attempt was made to access a socket in a way forbidden by its access permissions. : make_sock: could not bind to address 0.0.0.0:80
no listening sockets available, shutting down
Unable to open logs
原因及解决:有可能是系统80端口默认被占用了,可以修改conf/httpd.conf监听端口,Listen 80 修改为 Listen 8081(或其他端口号)
启动
D:\PythonWebSW\httpd-2.2.19-win64\bin>start httpd
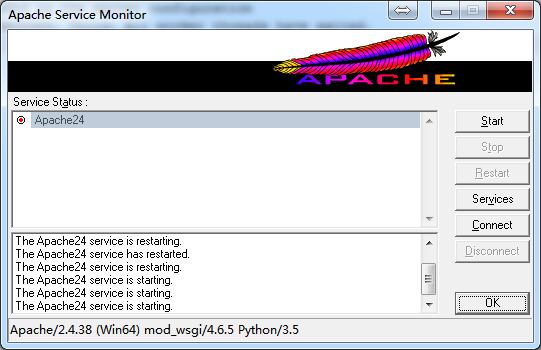
或者通过bin\ApacheMonitor.exe控制面板启动
卸载
D:\PythonWebSW\httpd-2.2.19-win64\bin>httpd -k uninstall -n “Apache24”
测试
开启Apache服务,输入ip和端口访问(默认访问的是\htdocs\index.html)
访问 http://127.0.0.1:8082/,It works!
自动安装
通过编写bat脚本自动安装Apache,减少劳动量。
- 在apache的文件目录下创建一个bat文件:win_install.cmd
- 输入示例代码,保存,以管理员身份运行,即可安装成功
- 安装成功之后,在服务管理器可以开启和停止服务
脚本
echo "正在安装Apache24";
::作用:以管理员身份安装Apache 说明:在 windows10 x64下工作正常
d:
cd %~dp0bin\
httpd.exe -k install -n "Apache24"
pause
结果
C:\Windows\system32>echo "正在安装Apache24";
"正在安装Apache24";
C:\Windows\system32>d:
D:\>cd D:\Server\Apache24\bin\
D:\Server\Apache24\bin>httpd.exe -k install -n "Apache24"
mod_wsgi
下载
注意:下载mod_wsgi.so版本需和python和apache匹配
下载路径 http://www.lfd.uci.edu/~gohlke/pythonlibs/#mod_wsgi
我之前下过一个对应apache22和python2.7的版本,名字mod_wsgi-win32-ap22py27-3.3,这个可以直接用,所以一直用着,网上可以直接搜到。
最新的版本(2019)里不能直接下载.so文件,是whl文件,比如我现在下的是mod_wsgi‑4.6.5+ap24vc14‑cp35‑cp35m‑win_amd64.whl,对应各版本如下:
apache 24 + vc14
python35
win64
安装和配置
mod_wsgi.so
将mod_wsgi.so放到moduels目录下 , 并在httpd.conf里加载
modules目录:
d:\Program Files\Apache Software Foundation\Apache2.2\modules\
加载命令
LoadModule wsgi_module modules/mod_wsgi.so
httpd.conf的位置在
d:\Program Files\Apache Software Foundation\Apache2.2\conf\
注意:apache装载wsgi模块,名字可以自定义
最新版本更新
最新的版本不支持.so加载这种方式,是用whl安装,然后加载modules
参考 https://github.com/GrahamDumpleton/mod_wsgi/blob/master/win32/README.rst
These instructions should no longer be used. To install mod_wsgi on Windows run pip install mod_wsgi. Once it has been successfully installed, run the command mod_wsgi-express module-config. Copy the output of that command and add it to your Apache configuration to have it load mod_wsgi.
安装命令
pip install "mod_wsgi-4.6.5+ap24vc14-cp35-cp35m-win_amd64.whl"
执行配置
mod_wsgi-express module-config
输出如下
(env35) E:\Computer\virtualenv\webscrapping\jse_scrap>mod_wsgi-express module-config
LoadFile "D:/Python35/python35.dll"
LoadModule wsgi_module "e:/computer/virtualenv/webscrapping/env35/lib/site-packages/mod_wsgi/server/mod_wsgi.cp35-win_amd64.pyd"
WSGIPythonHome "e:/computer/virtualenv/webscrapping/env35"
把以上内容添加到http.conf
mod_wsgi-4.6.5+ap24vc9-cp27-cp27m-win32.whl我也尝试过这种方式
E:\Computer>pip install "mod_wsgi-4.6.5+ap24vc9-cp27-cp27m-win32.whl"
Looking in indexes: https://pypi.tuna.tsinghua.edu.cn/simple
Processing e:\computer\mod_wsgi-4.6.5+ap24vc9-cp27-cp27m-win32.whl
Installing collected packages: mod-wsgi
Successfully installed mod-wsgi-4.6.5+ap24vc9

E:\Computer>mod_wsgi-express module-config
LoadModule wsgi_module "d:/python27/lib/site-packages/mod_wsgi/server/mod_wsgiNone"
WSGIPythonHome "d:/python27"
命令生成的名字就不对,mod_wsgiNone应该是mod_wsgi.pyd,即使手动把名字改过来还是提示无法加载。对应的apache是httpd-2.2.34-win32,VC版本不一致,不确定是否跟它有关(apache里的描述说VC10能支持VC9)。
配置 httpd.conf
搜索http.conf文件,把”Deny from all” 及 “Require all denied” 等语句全部注释掉:
<Directory />
    Options FollowSymLinks
    AllowOverride None
    Require all denied
    Order deny,allow
    Deny from all
</Directory>
修改为
<Directory />
    Options Indexes FollowSymLinks
    AllowOverride None
</Directory>
测试wsgi
添加test.wsgi文件,我放在项目下面的apache文件夹下,这个文件夹是专门用来放跟apache相关的配置的
def application(environ, start_response):
    status = '200 OK'
    output = 'Hello World!'
    response_headers = [('Content-type', 'text/plain'),
                        ('Content-Length', str(len(output)))]
    start_response(status, response_headers)

    return [output]
python3里面有一处需要修改,否则报错如下
TypeError: sequence of byte string values expected, value of type str found\r
参考https://stackoverflow.com/questions/34838443/typeerror-sequence-of-byte-string-values-expected-value-of-type-str-found,修改output = 'Hello World!'为output = b'Hello World!'
在http.conf里面引入这段代码来调用
Include "C:/virtualenv/zakkabag/apache/apache_django_wsgi_test.conf"
apache_django_wsgi_test.conf
DocumentRoot "C:/virtualenv/zakkabag/"

<Directory "C:/virtualenv/zakkabag/">
    Options FollowSymLinks Includes ExecCGI
    AllowOverride None
    Order deny,allow
    Allow from all
</Directory>
WSGIScriptAlias / "C:/virtualenv/zakkabag/apache/test.wsgi"
注:这儿监听端口是8081
项目配置
项目主目录
在项目目录下面创建一个文件夹apache,添加文件“django.wsgi” & “apache_django_wsgi.conf”
和test.wsgi一样,我们也可以用这个方法引入这段配置
Include " C:/virtualenv/zakkabag/apache/apache_django_wsgi.conf"
注:这些配置文件可直接写在httpd.conf文件里,但我倾向于用专门的文件,这样便于项目维护
apache_django_wsgi.conf 测试项目
WSGIScriptAlias / " C:/virtualenv/zakkabag/apache/test.wsgi"
实际项目
WSGIScriptAlias / " C:/virtualenv/zakkabag/apache/django.wsgi"
<Directory " C:/virtualenv/zakkabag ">
    Options FollowSymLinks
    AllowOverride None
    Order deny,allow
    Allow from all
</Directory>
django.wsgi
os.environ['DJANGO_SETTINGS_MODULE'] = "zakkabag.settings"
import django
django.setup()
import django.core.handlers.wsgi
application = django.core.handlers.wsgi.WSGIHandler()
静态资源
apache_django_wsgi.conf
Alias /static "C:/virtualenv/ zakkabag /static_in_env/static_root"
<Directory " C:/virtualenv/zakkabag/static_in_env ">
    Order allow,deny
    Allow from all
</Directory>
Django的setting里 Settings.py
STATIC_URL = '/static/'
重启
配置完成之后记得重启apache
https配置
参考 http://www.codingsoho.com/zh/blog/https-on-apache/
常见问题
问题1 (OS 5)Access is denied. : Apache2.2: OpenService failed
如果出现这个错误,用管理员权限打开cmd
问题2 (OS 1072)The specified service has been marked for deletion. : Apache2.2: Failed to delete the service.
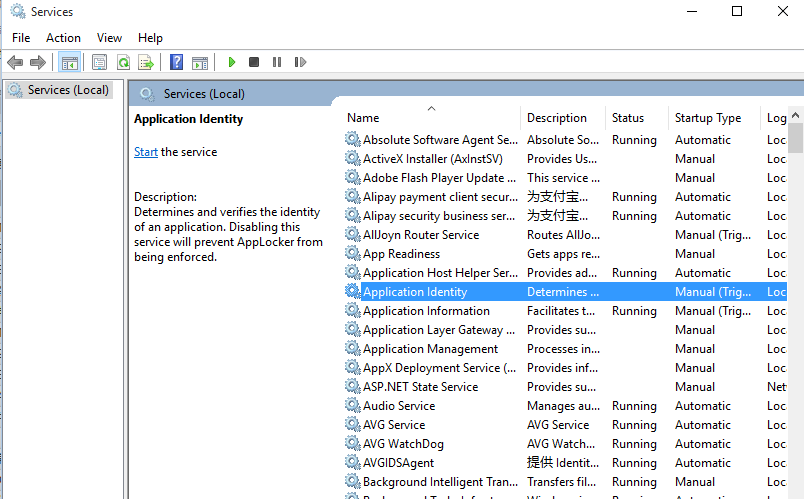
将service里面的停掉
问题3 ImproperlyConfigured: Error loading MySQLdb module: No module named MySQLdb
原因是MysqlLdb没有安装好,具体参考mysql安装指南文章
Window 安装文件:
MySQL-python-1.2.3.win-amd64-py2.7.exe
Linux:
MySQL-python==1.2.3
生成的文件如下
MySQL_python-1.2.3-py2.7.egg-info (文件夹)
MySQLdb (文件夹)
_mysql.pyd
_mysql_exceptions.py
_mysql_exceptions.pyc
_mysql_exceptions.pyo
问题4 机器上可能会配置多个apache,有的时候安装新的apache时需要先把之前install的uninstall
问题5 Django: AppRegistryNotReady()
在 django.wsgi, 添加setup()
os.environ['DJANGO_SETTINGS_MODULE'] = "zakkabag.settings"
import django
django.setup()
import django.core.handlers.wsgi
application = django.core.handlers.wsgi.WSGIHandler()
参考 http://stackoverflow.com/questions/24793351/django-appregistrynotready
setup()
This function is called automatically:
•   When running an HTTP server via Django’s WSGI support.
•   When invoking a management command.
It must be called explicitly in other cases, for instance in plain Python scripts.

评论
留言请先登录或注册! 并在激活账号后留言!