参考手册 runoob mysql tutorial | 自强学堂
安装 Installation
安装版 Note: MySQL Installer is 32 bit, but will install both 32 bit and 64 bit binaries. Download
免安装版
1) 解压到本地目录D:\mysql (example)
2) 将D:\mysql\bin添加到环境变量Path
3) 配置my.ini
将对应的字符集都改成utf8,否则中文处理会出问题
default-character-set=utf8
character-set-server=utf8
4) 安装 mysqld –install 5) 删除 mysqld –remove 6) 启动 net start mysql 7) Start SQL
安装成功后执行mysql会出现下面信息:
C:\Users\bhe001>mysql -uroot -p123
Welcome to the MySQL monitor. Commands end with ; or \g. Your MySQL connection id is 2 Server version: 5.5.12 MySQL Community Server (GPL)
Copyright (c) 2000, 2010, Oracle and/or its affiliates. All rights reserved.
Oracle is a registered trademark of Oracle Corporation and/or its affiliates. Other names may be trademarks of their respective owners.
Type 'help;' or '\h' for help. Type '\c' to clear the current input statement.
mysql>
常见问题
1: Install/Remove of the Service Denied!
解决方案:Cmd should be run with “Run As Administrator”
2:Host is not allowed to connect to this MySQL server解决方法
今天想访问阿里云主机的数据库,报错Host is not allowed to connect to this MySQL server
从网上搜索到的解决方案如下,验证通过
- 在装有MySQL的机器上登录MySQL mysql -uroot -p密码
> use mysql;> update user set host = '%' where user = 'root';> FLUSH PRIVILEGES;
第四步一定要执行,否则不生效
3: Mysql启动服务提示系统找不到指定的文件
mysqld --remove
mysqld --install
net start mysql
4: mysql 创建root用户和普通用户及修改删除功能
mysql -u root
mysql> SET PASSWORD FOR 'root'@'localhost' = PASSWORD('newpass');
或者用UPDATE直接编辑user表
mysql -u root
  mysql> use mysql;
  mysql> UPDATE user SET Password = PASSWORD('newpass') WHERE user = 'root';
  mysql> FLUSH PRIVILEGES;
数据库操作
创建数据库 create database
C:\WINDOWS\system32>mysql -uroot -p123 mysql> create database iexam;
Import exist database 导入
cd d:\PythonWebSW\mysql\bin mysql -hlocalhost -uroot -p123 sales < c:\database_restore.txt
-hlocalhost可选
有的时候可能会报错
ERROR at line 1065: Unknown command '\''.
原因:导入数据时的默认编码(utf8)与导出文件的默认编码(utf8mb4)不一致。
解决办法:
mysql -hlocalhost -uroot -p123 --default-character-set=utf8mb4 sales < c:\database_restore.txt
Export database 导出
mysqldump -uroot -p123 sales > D:/database_backup.txt
删除数据库 drop database
C:\Windows\System32>mysql -uroot -p123 mysql> drop database iexam;
MYSQL for django
安装 MySQLLdb
你还需要从 http://www.djangoproject.com/r/python-mysql/下载安装 MySQLdb。 安装源文件为:MySQL-python-1.2.3.win-amd64-py2.7.exe 安装的文件包括:
D:\PythonWebSW\Python27\Lib\site-packages\MySQL_python-1.2.3-py2.7.egg-info D:\PythonWebSW\Python27\Lib\site-packages\MySQLdb
通过whl安装
linux下面我们可以直接通过下面命令安装
pip3 install MySQL-python
Windows下面通过这个命令安装会报错
perror: Microsoft Visual C++ 14.0 is required. Get it with "Microsoft Visual C++ Build Tools": http://landinghub.visualstudio.com/visual-cpp-build-tools
可以从 http://www.lfd.uci.edu/~gohlke/pythonlibs下载编译好的安装文件,通过下面命令安装
pip3 install mysqlclient-1.3.13-cp36-cp36m-win_amd64.whl
创建数据库 create database
1) Create database, refer to setting.py file for the configuration
DATABASES = {
    'default': {
        'ENGINE': 'django.db.backends.mysql', # Add 'postgresql_psycopg2', 'mysql', 'sqlite3' or 'oracle'.
        'NAME': 'sales', # Or path to database file if using sqlite3.
        # The following settings are not used with sqlite3:
        'USER': 'root',
        'PASSWORD': '123',
        'HOST': '', # Empty for localhost through domain sockets or '127.0.0.1' for localhost through TCP.
        'PORT': '', # Set to empty string for default.
    }
}
2) Create table
Enter project directory
python manage.py syncdb OR python manage.py migrate
> <pre> D:\eclipse-workspace\voith_sales>python manage.py syncdb Creating tables ... Creating table area Creating table country Creating table region ….. Creating table django_flatpage Creating table django_admin_log
You just installed Django's auth system, which means you don't have any superusers defined. Would you like to create one now? (yes/no): y Please enter either "yes" or "no": yes Username (leave blank to use 'alu'): alu Email address: Password:123 Password (again):123 Superuser created successfully. Installing custom SQL ... Installing indexes ... Installed 0 object(s) from 0 fixture(s) </pre>
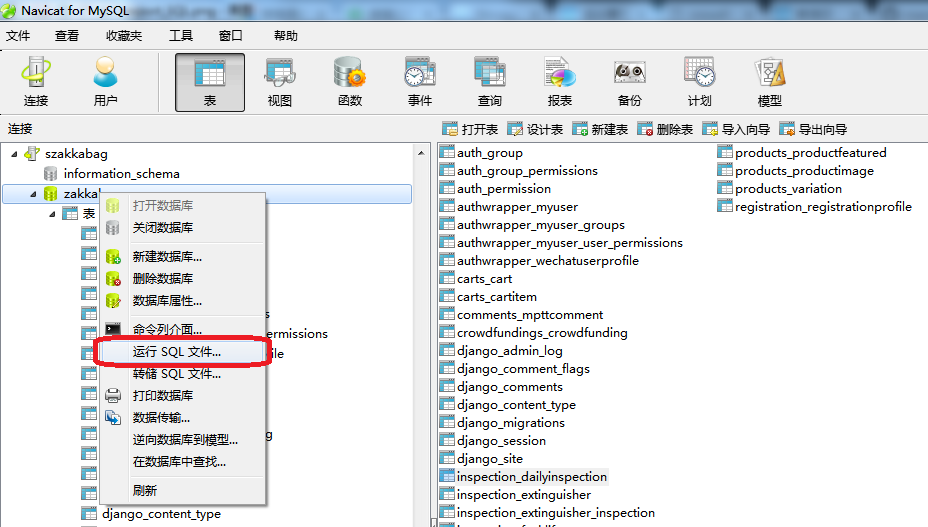
Navicat for MySQL
数据库导入和导出
导出数据库

导出数据表

导入数据库或表
python操作数据库
导入数据库
连接数据库
import MySQLdb
db_conn = MySQLdb.connect(host="localhost", user="bhe001", passwd="123456");
"""
connect方法常用参数:
host: 数据库主机名.默认是用本地主机
user: 数据库登陆名.默认是当前用户
passwd: 数据库登陆的秘密.默认为空
db: 要使用的数据库名.没有默认值
port: MySQL服务使用的TCP端口.默认是3306
charset: 数据库编码
"""
问题
2059, "Authentication plugin 'caching_sha2_password' cannot be loaded
使用下面语句连接数据库时出现报错
db_conn = MySQLdb.connect(host="localhost", user="test", passwd="123456");
报错如下
_mysql_exceptions.OperationalError: (2059, "Authentication plugin 'caching_sha2_password' cannot be loaded: The specified module could not be found.\r\n")
以上报错是由于目前当前连接还不支持MySQL8新增加的加密方式caching_sha2_password,所以我们需要修改用户的加密方式,将其改为老的加密验证方式。
当前用户为test,所以我们登陆test用户, 然后执行命令
mysql> use mysql;
Database changed
mysql> select user,plugin from user where user='test';
+--------+-----------------------+
| user | plugin |
+--------+-----------------------+
| test| caching_sha2_password |
+--------+-----------------------+
1 row in set (0.01 sec)
可以看到当前用户的加密方式为caching_sha2_password
执行命令,将用户的加密方式改为mysql_native_password。
mysql> alter user 'test'@'%' identified with mysql_native_password by '123456';
Query OK, 0 rows affected (0.13 sec)

mysql> select user,plugin from user where user='test';
+--------+-----------------------+
| user | plugin |
+--------+-----------------------+
| test| mysql_native_password |
+--------+-----------------------+
1 row in set (0.01 sec)
执行命令flush privileges使权限配置项立即生效。
mysql> flush privileges;
Query OK, 0 rows affected (0.02 sec)
再次用python连接,成功!
获取操作游标
cursor = db_conn.cursor()

# 使用 execute 方法执行SQL语句
cursor.execute("SELECT VERSION()")

# 使用 fetchone 方法获取一条数据库。
dbversion = cursor.fetchone()
print("Database version : %s " % dbversion)

# 创建数据库
cursor.execute("create database if not exists dbtest")

# 选择要操作的数据库
db_conn.select_db('dbtest');
执行结果如下
>>> cursor = db_conn.cursor()
>>> cursor.execute("SELECT VERSION()")
1
>>> dbversion = cursor.fetchone()
>>> print("Database version : %s " % dbversion
... )
Database version : 5.5.12
>>> cursor.execute("create database if not exists dbtest")
1
>>> db_conn.select_db('dbtest');
创建数据表
sql = """CREATE TABLE if not exists employee(
    first_name CHAR(20) NOT NULL,
    last_name CHAR(20),
    age INT,
    sex CHAR(1),
    income FLOAT )"""
try:
    cursor.execute(sql)
except Exception as e:
    # Exception 是所有异常的基类,这里表示捕获所有的异常
    print("Error to create table:", e)
查看结果
数据表结构
mysql> show tables;
+------------------+
| Tables_in_dbtest |
+------------------+
| employee |
+------------------+
1 row in set (0.00 sec)

mysql> desc employee;
+------------+----------+------+-----+---------+----------------+
| Field | Type | Null | Key | Default | Extra |
+------------+----------+------+-----+---------+----------------+
| id | int(11) | NO | PRI | NULL | auto_increment |
| first_name | char(20) | NO | | NULL | |
| last_name | char(20) | YES | | NULL | |
| age | int(11) | YES | | NULL | |
| sex | char(1) | YES | | NULL | |
| income | float | YES | | NULL | |
+------------+----------+------+-----+---------+----------------+
6 rows in set (0.01 sec)
插入数据
我们先执行插入一条记录
cursor.execute("INSERT INTO employee(first_name,last_name, age, sex, income) VALUES ('Mac', 'Mohan', 20, 'M', 2000)")
db_conn.commit()
记得加commit命令,否则结果不会写到数据库中
查看表内容
mysql> select * from employee;
+----+------------+-----------+------+------+--------+
| id | first_name | last_name | age | sex | income |
+----+------------+-----------+------+------+--------+
| 1 | Mac | Mohan | 20 | M | 2000 |
+----+------------+-----------+------+------+--------+
1 row in set (0.00 sec)
下面代码可以构建多条记录的插入
sql = """INSERT INTO employee(first_name,
    last_name, age, sex, income)
    VALUES ('%s', '%s', %d, '%s', %d)"""
employees = (
    {"first_name": "Mac", "last_name": "Mohan", "age": 20, "sex": "M", "income": 2000},
    {"first_name": "Wei", "last_name": "Zhu", "age": 24, "sex": "M", "income": 7500},
    {"first_name": "Huoty", "last_name": "Kong", "age": 24, "sex": "M", "income": 8000},
    {"first_name": "Esenich", "last_name": "Lu", "age": 22, "sex": "F", "income": 3500},
    {"first_name": "Xmin", "last_name": "Yun", "age": 31, "sex": "F", "income": 9500},
    {"first_name": "Yxia", "last_name": "Fun", "age": 23, "sex": "M", "income": 3500}
)
事务处理与处理异常
在上面将插入命令构建好之后,接下来可以用下面的命令插入到数据库中
try:
    cursor.execute("delete from employee")
    for employee in employees:
        cursor.execute(sql % (employee["first_name"], \
        employee["last_name"], \
        employee["age"], \
        employee["sex"], \
        employee["income"]))
    db_conn.commit()
    # 对于支持事务的数据库, 在Python数据库编程中,当游标建立之时,就自动开始了一个隐形的数据库事务。
except Exception as e:
    # Rollback in case there is any error
    print("Error to insert data:", e)
    # b_conn.rollback()
上面执行语句一开始会清空表,下面是执行结果
mysql> select * from employee;
+----+------------+-----------+------+------+--------+
| id | first_name | last_name | age | sex | income |
+----+------------+-----------+------+------+--------+
| 13 | Mac | Mohan | 20 | M | 2000 |
| 14 | Wei | Zhu | 24 | M | 7500 |
| 15 | Huoty | Kong | 24 | M | 8000 |
| 16 | Esenich | Lu | 22 | F | 3500 |
| 17 | Xmin | Yun | 31 | F | 9500 |
| 18 | Yxia | Fun | 23 | M | 3500 |
+----+------------+-----------+------+------+--------+
6 rows in set (0.00 sec)
操作结果
print("Insert rowcount:", cursor.rowcount
)
# rowcount 是一个只读属性,执行execute()方法后影响的行数。
查询数据
try:
    cursor.execute("select * from employee")
    rs = cursor.fetchone()
    print(rs)
    rs = cursor.fetchmany(2)
    print(rs)
    ars = cursor.fetchall() # 获取剩下的所有记录
    for rs in ars:
        print(rs)
except Exception as e:
    print("Error to select:", e)
显示结果
(19, 'Mac', 'Mohan', 20, 'M', 2000.0)
((20, 'Wei', 'Zhu', 24, 'M', 7500.0), (21, 'Huoty', 'Kong', 24, 'M', 8000.0))
(22, 'Esenich', 'Lu', 22, 'F', 3500.0)
(23, 'Xmin', 'Yun', 31, 'F', 9500.0)
(24, 'Yxia', 'Fun', 23, 'M', 3500.0)
更新数据
sql = "UPDATE employee SET age = age + 1 WHERE sex = '%c'" % ('M')
try:
    cursor.execute(sql)
    db_conn.commit()
    cursor.execute("select * from employee")
    ars = cursor.fetchall()
    print("After update: ------")
    for rs in ars:
        print(rs)
except Exception as e:
    print("Error to update:", e)
    db.rollback()
更新后结果如下
After update: ------
(19, 'Mac', 'Mohan', 21, 'M', 2000.0)
(20, 'Wei', 'Zhu', 25, 'M', 7500.0)
(21, 'Huoty', 'Kong', 25, 'M', 8000.0)
(22, 'Esenich', 'Lu', 22, 'F', 3500.0)
(23, 'Xmin', 'Yun', 31, 'F', 9500.0)
(24, 'Yxia', 'Fun', 24, 'M', 3500.0)
关闭数据库连接
cursor.close()
db_conn.close()
查询可选MySQL驱动
C:\Users\Administrator>pip search mysql | more
mysql (0.0.2) - Virtual package for MySQL-python
weibo-mysql (0.1) - insert mysql
MySQL-python (1.2.5) - Python interface to MySQL
  INSTALLED: 1.2.3
  LATEST: 1.2.5
bottle-mysql (0.3.1) - MySQL integration for Bottle.
...

mysql官方python驱动[https://dev.mysql.com/downloads/connector/python/](https://dev.mysql.com/downloads/connector/python/)
文档链接 https://dev.mysql.com/doc/connector-python/en/connector-python-connectargs.html
Topics
What's the difference between identifying and non-identifying relationships?
An identifying relationship is when the existence of a row in a child table depends on a row in a parent table. This may be confusing because it's common practice these days to create a pseudokey for a child table, but not make the foreign key to the parent part of the child's primary key. Formally, the "right" way to do this is to make the foreign key part of the child's primary key. But the logical relationship is that the child cannot exist without the parent.
Example: A Person has one or more phone numbers. If they had just one phone number, we could simply store it in a column of Person. Since we want to support multiple phone numbers, we make a second table PhoneNumbers, whose primary key includes the person_id referencing the Person table.
We may think of the phone number(s) as belonging to a person, even though they are modeled as attributes of a separate table. This is a strong clue that this is an identifying relationship (even if we don't literally include person_id in the primary key of PhoneNumbers).
A non-identifying relationship is when the primary key attributes of the parent must not become primary key attributes of the child. A good example of this is a lookup table, such as a foreign key on Person.state referencing the primary key of States.state. Person is a child table with respect to States. But a row in Person is not identified by its state attribute. I.e. state is not part of the primary key of Person.
A non-identifying relationship can be optional or mandatory, which means the foreign key column allows NULL or disallows NULL, respectively.
Tools
workbench
反向工程
Database - Reverse Engineer Database